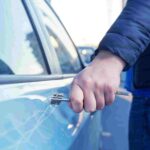
Accidents happen. Whether it’s a minor scrape in a parking lot or a brush with a rogue shopping cart, paint transfer can be a real eyesore on your precious car. But fear not, fellow auto enthusiasts! In this comprehensive guide, we’ll provide step-by-step instructions on how to remove paint transfer from your vehicle like a pro. With some patience, the right tools, and our expert advice, you’ll have your car looking good as new in no time.
Assessing the Damage
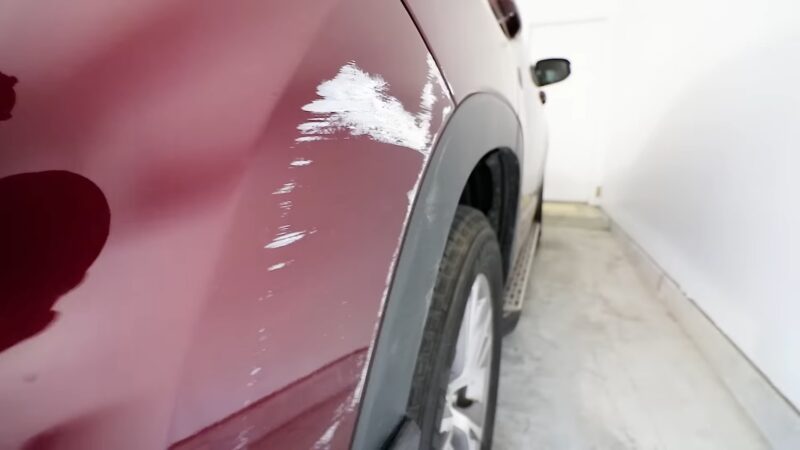
Before diving into the removal process, it’s crucial to assess the severity of the damage. Light to moderate paint transfer can often be removed with simple at-home methods, while severe damage may require professional help. Inspect the affected area to determine the depth and extent of the paint transfer. If it’s only superficial and hasn’t damaged the underlying paint, you’re in luck! Our guide will walk you through the removal process.
Identifying Types of Paint Transfer
Paint transfer can occur in various forms, and understanding the type of paint transfer on your car is crucial for selecting the appropriate removal method. Here are some common types:
Clear coat transfer
This occurs when only the clear coat of another vehicle is transferred to your car’s surface. This type of transfer is typically easier to remove and may only require detailing clay or a light rubbing compound.
Color transfer
This happens when the colored paint from another vehicle is transferred to your car. Color transfer can be more challenging to remove and may necessitate the use of rubbing compound, scratch remover, or wet sanding, depending on the severity.
Plastic or rubber transfer
This occurs when plastic or rubber material from another vehicle or object is transferred onto your car’s paint. This type of transfer can often be removed with detailing clay or a specialized adhesive remover.
Gathering the Necessary Supplies
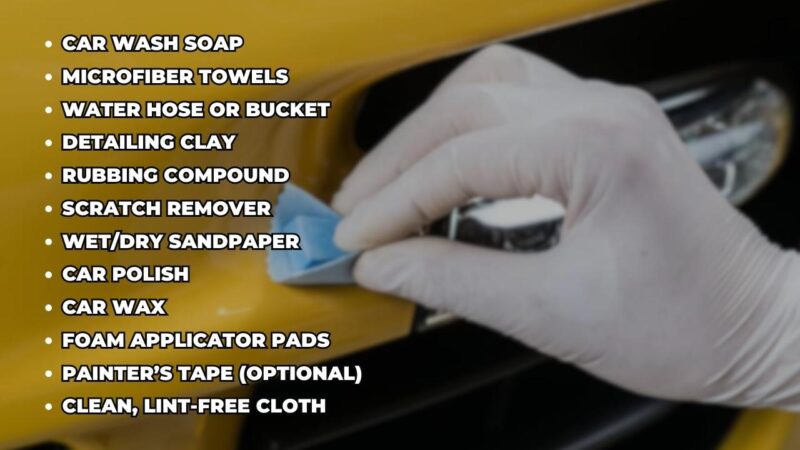
To remove paint transfer from your car, you’ll need the following items:
- Car wash soap
- Microfiber towels
- Water hose or bucket
- Detailing clay
- Rubbing compound
- Scratch remover
- Wet/dry sandpaper)
- Car polish
- Car wax
- Foam applicator pads
- Painter’s tape (optional)
- Clean, lint-free cloth
Having these supplies on hand will make the removal process smoother and more efficient.
Prepping the Area
Before you begin, it’s essential to clean the affected area thoroughly. Any dirt or debris can potentially cause further scratches or damage during the paint transfer removal process. Wash the area with car wash soap and water, then rinse and dry with a microfiber towel.
Removal With Detailing Clay
For light paint transfer, detailing clay can work wonders. It’s a non-abrasive material that can gently remove paint transfer without harming your car’s original paint. Here’s how to use it:
- Spray the affected area with a clay lubricant or a mixture of water and car wash soap.
- Flatten a piece of detailing clay into a thin disc.
- Gently rub the clay over the paint transfer in a back-and-forth motion, applying light pressure.
- Wipe the area with a microfiber towel and check for progress. If the paint transfer remains, repeat the process.
- When the paint transfer is removed, clean the area with water and a microfiber towel.
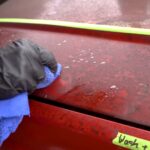
Removal With a Rubbing Compound
For moderate paint transfer, a rubbing compound can be used to break down the transferred paint and remove it from your car’s surface. Follow these steps:
- Apply a small amount of rubbing compound to a foam applicator pad.
- Gently rub the applicator pad on the paint transfer in a circular motion, applying light to moderate pressure.
- Check your progress regularly to avoid removing too much of your car’s original paint.
- When the paint transfer is removed, clean the area with a damp microfiber towel.
Removal With Scratch Remover
If the paint transfer is more severe or embedded into your car’s paint, a scratch remover can help to break down the transferred paint and restore the original finish. Follow these steps:
- Apply a small amount of scratch remover to a foam applicator pad.
- Gently rub the applicator pad on the paint transfer in a circular motion, applying light to moderate pressure.
- Check your progress regularly to avoid removing too much of your car’s original paint.
- When the paint transfer is removed, clean the area with a damp microfiber towel.
Sanding and Polishing (For Severe Cases)
In cases where the paint transfer is severe and has penetrated the clear coat, wet sanding and polishing may be necessary. This process should be performed with caution, as it can potentially damage your car’s paint if not done correctly. If you’re unsure about your abilities, consider seeking professional help.
- Start by applying painter’s tape around the affected area to protect the surrounding paint.
- Dip a piece of wet/dry sandpaper (1,500 to 2,000 grit) in water.
- Gently sand the paint transfer in a back-and-forth motion, keeping the sandpaper wet throughout the process.
- Regularly check your progress, stopping once the paint transfer is removed.
- To restore your car’s shine, apply a polishing compound to a foam applicator pad and buff the area in a circular motion.
- Wipe the area with a clean, lint-free cloth to remove any polishing residue.
Waxing and Sealing
After removing the paint transfer and restoring your car’s finish, it’s important to protect the area with a layer of wax. This will help to seal the paint and prevent future damage.
- Apply a small amount of car wax to a foam applicator pad.
- Gently buff the wax onto the area in a circular motion, making sure to cover the entire affected area.
- Allow the wax to dry for the recommended time on the product packaging.
- Using a clean, lint-free cloth, buff the wax off the area until a high-gloss shine is achieved.
Preventing Future Paint Transfer
While accidents can’t always be avoided, there are a few steps you can take to minimize the risk of paint transfer:
- Park in well-lit, low-traffic areas to reduce the chance of scrapes and scratches.
- Install bumper guards or door edge guards to protect your car from minor impacts.
- Maintain a safe distance from other vehicles and obstacles while driving and parking.
- Keep your car’s paint in good condition with regular washing, waxing, and paint protection treatments.
Dealing with unexpected tree sap on your car’s surface can be a hassle, especially when you’re concerned about avoiding any damage to the paint. Thankfully, there are easy solutions available that can help you tackle this issue effectively. By following the tips and tricks in our article on How to Remove Tree Sap you’ll discover effective methods to safely remove tree sap without causing any harm to your vehicle’s paintwork. These techniques will leave your car looking pristine and free from any unwanted residue.
Final Words
Removing paint transfer from your car may seem daunting, but with the right tools and techniques, it’s a manageable task that can be tackled by most car owners. By following the steps outlined in this guide, you’ll be well on your way to restoring your car’s appearance and protecting it from future paint transfer incidents. Keep in mind that if the damage is severe or you’re unsure of your abilities, it’s always best to consult with a professional for the best results.